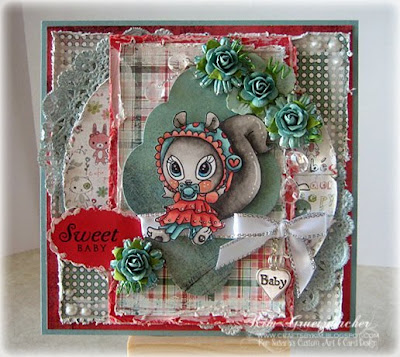
Showing posts with label Basic Grey. Show all posts

Friday, October 22, 2010

TIOT #88 - Suzanne's Sketch

Hi Everyone~

Yes, it's Friday and I am finally posting my TIOT!  Sorry it's a day late...it's been a crazy school week!  Had an exam on Tuesday so I didn't get any crafty time this week.  This week over at the SCACD Blog Suzanne has challenged us to use a super fun sketch!
 Today I have used the super fun Little Sprite from the New Mini Little Acorns Collection by Victoria Case for SCACD.  Papers are from the Basic Grey Euphoria Collection.
Little Sprite was colored with Copics and accented with a white gel pen.  I've used the two different color technique that I also made on -->this little acorn card<--.  She's been popped up on top of a SB Labels 14 which was then popped up on top of a SB Labels 4.  The glitter around the edge of the Labels 14 has been created with my TonerTex pen and glitters, I've used the teal colored glitter.  I've also used the TonerTex Foils on the middle of the flowers of Sprite's dress.
 These gorgeous Epoxy Baubles were made using the Ephiphany Crafts Solid Round 14 Maker and Round 14 Bubble Caps. If you haven't read my post on the Ephiphany Crafts, click -->HERE<-- to go and see more info regarding them!  They truly are amazing products!
Flowers of course are from the fabulous Wild Orchid Crafts!  For my arrangment I have used a Gardenia, 20mm Roses, 15mm Roses, 10mm Roses, and 4mm Closed Rosebuds.


SHOPPING NEWS~ SCACD has gotten some AMAZING NEW paper pads in!  Check out the Brand New Kaisercraft After 5 , English Rose. and Seaside!  Then there are also Brand New Webster Pages Santa/Sweet Season and Wonder Fall/Hollywood Vogue! All of these are amazing...I just ordered mine today...and can't wait to get them!  While you are at the store make sure you check out the Viva Decor products, Susana recently reduced the price of the AMAZING Pearl Pens!  Happy Shopping!
Now make sure you head over to the SCACD Blog and see what the other DT members have made...their projects are gorgeous!

Recipe:
Stamps: Little Sprite from the New Mini Little Acorns Collection by Victoria Case for SCACD.
Inks: Memento Tuxedo Black, Copics, White Gel Pen,
Copic Colors Used: Basket: E25, E53, E57, E59, Shading: C3, W3, Ladybug: R02, R08, Skin: E000, E00, E11, Hair: E25, E47, E49, E53, Dress and Hat: BV0000, BV000, BV00, V12, V17, BG000, BG10, BG13, BG49
Papers: Basic Grey Euphoria Collection
Tools: SB Labels 14, SB Labels 4, Ephiphany Crafts Solid Round 14 Maker,  Round 14 Bubble Caps.
Embellishments: TonerTex pen and glitters, TonerTex Foils, Gardenia, 20mm Roses, 15mm Roses, 10mm Roses, and 4mm Closed Rosebuds.


♥ Thanks for stopping by! ♥
Photobucket

Tuesday, September 28, 2010

SCACD Little Acorn Sneak Peek

I'm SUPER pumped today because I get to share with you a preview from the DUAL MINI RELEASE from SCACD!  If you haven't read my previous posts.....I'll share the info again, we are having two mini releases--one from Elisabeth Bell and one from Victoria Case for SCACD!  Both of these mini sets will be released this Thursday (Sept. 30th) so mark your calendars because you don't want to miss this release....I'm telling you they are all a MUST have!!!!  And don't forget that Susana has some AMAZING Blog Candy at the store blog!  Click -->HERE<-- to go and enter!  So today I'm using one of the cute NEW Victoria Case images called "Little Acorn" from the Mini Little Acorn Set! 
She's so sweet with her cute little ladybug!  She's definitely a favorite from this new release....I absolutely love her!  Papers are from the NEW Basic Grey Pyrus Collection, boy do I love this stack!  Gorgeous colors!  Corners have been jazzed up with my Viva Decor Dark Brown Pearl Pen.
 
Little Acorn was colored with Copics and accented with a white gel pen.  Her little ladybug friend was decorated with my TonerTex pen and Red FoilViva Decor Glitter Liner in Hologram was used on her hair ties for extra sparkle.  Stamped the swirly leaf frame and then used Metallic Rub On in Sky Blue to add a soft shimmer to the edges.  Love the sparkle and shimmer that the Metallic Rub On adds! 
As I promised last night, this card also showcases the Epiphany Crafts Flower 20 Button Maker!  I love how you can customize your buttons to match your project with these fun tools, and I think they are very reasonably priced, and SUPER EASY to use!  They truly punch like a dream.  If you have arthritis or problems with your hands and you are worried about punches being too tough for you, these certainly are NOT a concern at all!  You hardly use any pressure when punching.  I've also used my Bow Easy to create the beautiful bow. 
Flowers are from the fabulous Wild Orchid Crafts.  Arrangement consists of 35mm Large Wild Rose, 25mm Wild Roses, Aster Daisies, 15mm Rose, 8mm semi-open roses, 5mm closed rosebud.  All flowers started out white, I used my Copic ABS to get the exact colors to match my card.  Then flowers got a coat of Illuminate Smooch to jazz them up!

I hope you've enjoyed this sneak peek!  Wait until you see the rest of the collection at the SCACD DT's Blog Hop on Thursday, Sept. 30th....seriously all these stamps are gotta haves!!! :)  If you haven't already signed up for Susana's WONDERFUL NEW RELEASE CANDY, make sure you head over to the SCACD Store Blog HERE to sign up now, you only have until Wednesday to sign up!

Challenge I would like to enter:
Friday Sketchers - Jeanette's Sketch

Recipe:
Stamps: Little Acorn by Victoria Case for SCACD (will be released Thurs. Sept 30th), Artistic leaves (Hero Arts), Essential Sentiments (MFT),
Inks: Memento Tuxedo Black, Memento Rich Cocoa, Copics, White Gel Pen,
Copic Colors Used: Acorn: E01, E15, E29, Hat: E41, E42, E43, E44, Skin: E000, E00, E11, R02, Shading: W3, Hair: E25, E49, E53, E59, Eyes: E0000, E02, E04, Pants: BG000, BG01, BG05, BG09, Shirt/Shoes: Y32, YR21, YR24, Ladybug:T02, T04, T06
Papers: Basic Grey Pyrus Collection
Tools: Epiphany Crafts Flower 20 Button Maker, Bow Easy, Word Window Punch and Modern Label Punch (SU)
Embellishments: Viva Decor Dark Brown Pearl Pen, TonerTex pen and Red FoilViva Decor Glitter Liner in Hologram, Metallic Rub On in Sky Blue, Illuminate Smooch, 35mm Large Wild Rose, 25mm Wild Roses, Aster Daisies, 15mm Rose, 8mm semi-open roses, 5mm closed rosebud (Wild Orchid Crafts), Ribbon, and Raffia.


♥ Thanks for stopping by! ♥
Photobucket

Thursday, August 26, 2010

Stamps and Smiles Release - Day 4

Hello everyone.....WOW we are already on day 4 of our BRAND NEW STAMP RELEASE by Stamps and Smiles. So far we have revealed 8 NEW stamp sets, and tomorrow will be our last day of samples and the reveal of 10 NEW sets - WOO HOO!!!  Want more fun and a chance to win more FREE stamps??? Join us tomorrow night for our Blog Hop from 8 - 9 pm CST.  Everyone is invited, AND one lucky winner will win 5 FREE stamp sets from the NEW release.  Now that should make you want to come and have some fun!!!


Today I'm on a mini vacation before my classes start next week!  Hubby is taking me to the Milwaukee Zoo...it's about a 2 1/2 hour trip....we are also going to hit the outlet mall close buy and then stay over night somewhere.  A nice little get away!


Now let's check out the two new sets of stamps for today.....we have Money Pig #1 and Money Pig #2.
This first sample features Money Pig #1....I decided to turn it into a girl buy using the bow from a stamp set that will be revealed tomorrow (oooo a secret...aren't you excited to see what it will be?!)  Then I took my Copic multiliner and drew some extended eyelashes on Miss. Money Piggy to add extra girliness!  Went for the distressed vintage look again...sorry I just can't help myself...especially with having the Distress-It-All makes it soooo easy!  Papers are from the Basic Grey Olivia CollectionGuipure Lace is from the wonderful Wild Orchid Crafts.  Corners have been accented with my Viva Decor Ice White Pearl Pen.
Miss. Money Pig was colored with Copics and accented with a white gel pen.  She's been popped up onto an oval nestie that has been airbrushed with my Copic ABS and then placed on a scalloped oval nestie.  The scallops were accented with my Viva Decor Glitter Liner in Hologram.
Flowers are from WOC and consist of Classic Sweet Rose, two 30mm Wild Roses, 15mm Roses (that started as white and were airbrushed to match the dark blue paper), Aster Daisy, 5mm closed rosebuds (that were also airbrushed).  All flowers (of course *wink*) were glitzed with star dust stickles.
Here you can see all the shimmer and glitz.  Star Dust Stickles was added to Miss. Piggy's bow and collar.

Now onto Money Pig #2....I did a girl and a boy version of this stamp set.  First we will start with the boy card:
Isn't this piggy so cute?  I love these stamp sets!!!  (Oh, did I already say that...hee hee)  I've used the sketch from MMSC68 for this card.  Papers are from the Basic Grey Oliver Collection.
This little piggy has been colored with Copics and accented with a white gel pen (naturally)!  Piggy has been popped up onto a Nellie die, which has been stamped with the 5 cent stamp from the stamp set in Hero Arts Shadow Ink...it's very faint on the kraft cardstock.  Then that die is on a Big Scallop Circle nestie.  My Viva Decor Graphite Gloss Pen was used to add the little pearls along the right side of the die.
To get the nickles to stay within the ribbon I laid my nickels where I wanted them and then poked holes into the paper with my paper piercer.  Then I wove ribbon through the holes to hold the money on the card....it's almost like magic! :)
Here you can see the dimension of the card.

Now for the Girl version of the same stamp set:

I love how you just add a bow and you can make this card for a girl...so versatile!  Papers are from the DCWV Linen Closet Collection.
Miss. Piggy was colored like the rest of the cards.  She's been popped up onto a Nellie die.
Flowers and Pearls are from Wild Orchid!  All flowers have started as white and were airbrushed...on the teal ones I have also used a brown to make them more vintage.  Arrangement consists of a 35mm Wild Rose, 20mm roses, 15mm roses, 10mm roses, and an aster daisy.  Pearls have been placed in corners of card, on corner flourish and on flowers....they are 5mm and 3mm Brown Pearls.
Second flower arrangement!  All flowers have been painted with Illuminate Smooch....first time I put this one flowers and I have to say I LOVE the look it gives!!!
Hopefully from this angle you can see the flowers decked out in the smooch.  It also has been applied to Miss. Piggy's bow and collar! :)  Hope you have enjoyed my piggies!!!

Here are the full version of the stamp sets:


***DON'T FORGET....Today's the last day to sign up to win the Elisabeth Bell candy over at SCACD!  Click -->HERE<-- to go and enter....plus don't forget to check out the sneak peeks over there!!!***

♥ Thanks for stopping by! ♥
Photobucket

Wednesday, August 25, 2010

WOJ #86 - Jane's Sketch

**WOW...I sure have a busy blog this week....another double post day today please scroll down for my Stamps and Smiles New Release Day 3 Preview post!  There is a FREE DIGI IMAGE available so make sure you check out that post!!!**
 
Hi Whiff of Joy Friends!  How are you all doing this lovely Wednesday...wow another two weeks have come and gone...where does the time go?!  Before I know it I will be back in classes....NOOOO can't I stay and craft all day? hee hee!

Before we get to this fortnight's challenge we have some sad DT news over at the WOJ Challenge Blog. Unfortunately, both our beloved team members, Donalda and Jacqui, have decided to step down from their positions with the team. You both are going to be missed extremely!  You both have been a HUGE inspiration to me and got me to where I am today and are such amazing friends!!!  Thanks so much to both of you!!!

Now onto our new challenge which is a sketch by our beloved Jane!  This week you have a chance to win a gift certificate of $25 to Simon Says Stamp thanks to Heidi!

Here's my take on Jane's Sketch....sorry hun, I added a few more layers in there...my fingers wouldn't stop!
I've used Willow with Coffee to Go for my card.  I can't believe I haven't colored her until now...she's definitely one of my favorites...although I like to think she is drinking chai as that is my FAVORITE drink...have to have me a cup every day...sometimes two!  (*Wink* to my friends Jennifer and Jennifer....at CHA I got them hooked on Tazo Chai too!!!  Love you two!) For my card, I went again with a vintage feel...I am really liking the vintage/shabby chic look!  Papers are from the Basic Grey Green at Heart Collection and have all been distressed with TH Tea Dye ink.  My Distress-It-All was used to distress the edges of the dp!  Love that thing makes distressing sooooo easy...although my hubby says "Gee that's a loud tool you got there!"  Like his tools in the garage aren't loud!  Geesh!

Here's Jane's Sketch.  As you can tell I did go a bit askew by throwing in a few more elements and swapping the Circle for an Oval.
Willow was colored with Copics and accented with a white gel pen.  I've added Diamond Glaze to her sunglasses for the gloss look.  My Viva Decor Rose Paper Pen was used to create the pearls on her bracelet.  Image was cut out with my SB Mega Ovals and popped up on a SB Mega Scalloped Oval.  3mm Spice self-adhesive pearls (from Wild Orchid Crafts) were used to accent my scalloped oval.  To finish off the image I used my stampabilities stamp to create the border around Miss. Willow.  For the heart....I took an already pink dolie heart and spritz it first with Cotton Candy Shimmerz Spritz (that's 25%off -->HERE<--) and after that dried I then spritzed it with Tattered Angels Bronze Glimmer Mist for more of an antique feel.

Of course we can't make a card without using some amazing Wild Orchid Craft flowers! :)  I went with the two tone champagne-pink look for this flower arrangement and used a flat Gardenia, two 30mm Wild Roses, and two 15mm roses.

Now make sure you head over to the WOJ Challenge to see what the other DT members have made! :)

Recipe:
StampsWillow with Coffee to Go (WOJ), Whimsical Words (SU), Flourish (Stampabilities)
Inks: Memento Tuxedo Black, Memento Rich Cocoa, Copics, White Gel Pen, TH Distrees Ink in Tea Dye
Copic Colors Used: Skin: E000, E00, E11, E21, R02, R11; Hair: E39, E99, YR24, Y23; Shoes: N2, N5, N7; Cup: E30, E31; Dress & Purse: R00, R11, R21, R22; Shadow: W3
PapersBasic Grey Green at Heart
Tools: Spellbinders - Mega Oval and Mega Scallop Oval, Labels 4, Large Scallop Edge Die (MFT), Nellie Corner Die,
Embellishments: flat Gardenia, 30mm Wild Roses, 15mm roses, 3mm Spice self-adhesive pearls, (Wild Orchid Crafts), Diamond Glaze, Viva Decor Rose Paper Pen, Cotton Candy Shimmerz Spritz, Tattered Angels Bronze Glimmer Mist, heart dolie.


♥ Thanks for stopping by! ♥
Photobucket

Tuesday, August 24, 2010

SCACD Sneek Peek - Binkies Rule!

**This is my 2nd Post of the Day, so please scroll down for my Stamps and Smiles post.**

Hi Friends...Welcome back to my Blog today!  I hope you are all having a fantastic week!  This is ANOTHER fun highlight of the week!  Today I get to share one of the BRAND NEW Elisabeth Bell for SCACD images that will be available for purchase on Friday, August 27th! These are all sooooo cute and I absolutely love them....they really are so sweet and adorable! 

So without further ado....meet BINKIES RULE:
Isn't she just adorable?  I love her to pieces!!!  For my card I decided to go with a shabby chic feel.  I used my Distress-It-All on the papers for the vintage feel.  Then I took my Crackle Paint in picket fence and painted the edges of the papers for the shabby chic feel!  Papers are from the Basic Grey Olivia collection.  Corners were jazzed up with my Viva Decor Ice White Pearl Pen to get the perfect size pearls that I wanted. 
Here is Miss. Binkie herself!  I just think she is so adorable and can be used for any type of card...whether it be a birthday card, a baby card, or a friendship card!  Binkie was colored with Copics and accented with a white gel pen.  She's been popped up on a Labels 6 Nestie.
Flowers are all Prima....small flowers are Teal Fairytale Roses layered on top of a flat Prima and a Prima Hydrangea.  To finish off the flower collection I added some Clear Crystal Chandeliers.
Bow was made with my Bow Easy and a charm was one I found in my stash.  From this view you can also see the dolie that I have added...it started out white and I used my Eucalyptus Shimmerz Spritz to color it to match the papers.  I love the soft shimmer that this spritz gives!
Sentiment is from PTI Mega Mixed Messages and here you can see the Crackle Paint that is around the edges of my papers.
Finally is another picture of Miss. Binkie so you can see the Diamond Glaze that I added to her eyes for that extra shine.  I hope you have enjoyed my sneek peek! 

Here is the schedule of my DT Sister's sneek peeks:

Today you can also see sneek peeks from:
Anki-TLC
Kim-Binkies Rule - (You are HERE)
Tomorrow (Wednesday) please visit:

Thursday please visit:

Again, these stamps will be available for purchase on FRIDAY, August 27th!

Don't forget that Susana has BLOG CANDY available over at the SCACD Blog where you can win some AMAZING stamps!!!  She is being VERY generous too....there are 4 chances to win this NEW Release...how awesome is that?!

Copic Colors Used: W00, W0, W1, W3, W5, W7, R02, R12, R22, R24, B000, B00, B04, BG11, BG18, BG72

Challenges I would like to enter:

♥ Thanks for stopping by! ♥
Photobucket

Stamps and Smiles Release - Day 2

Hello....are you ready for Day 2 of the Stamps and Smiles Release?  When I first saw these next stamp sets I was in awe over how cute they are....and then when I got to color them they were even more fun!  Today we are sharing two more sets with you....Little Stinker and Yummy in my Tummy!

First I will share my sample of Little Stinker with you:
This Little Piggy is crying and all he wants is his bottle or toys....isn't he so cute?  Papers are from K&Company Amy Butler Lotus Collection.  I kept the layout simple so I could focus more on the images of this amazing stamp set.
Images were colored with Copics and accented with a white gel penDiamond Glaze was used on baby piggy's eyes and tear for some extra shine.  Around the border of the image I used my white gel pen again and doodled the frame.  Then I took my Silver Stickles and decorated around the border.

Now for my Yummy in My Tummy sample:
This Little Piggy is all ready to party....This Piggy can be used for a birthday card, thank you card, job well done card....you name it!!!  As you can see I turned my piggy into a "She"....I took the bow from a set that will be released later in the week (wink wink)...and turned my piggy into Miss. Piggy! :)  Paper used are from the Basic Grey Green at Heart Collection.
My Miss. Piggy was colored with Copics and cut out with my Nellie Snellen die. I've used Diamond Glaze on Miss. Piggy's eyes for some extra shine.
Flowers are from the fabulous Wild Orchid Crafts, and consist of a Classic Sweet Rose, Cherry Blossoms, 15mm Roses, 10mm Roses, and Purple Crystal Chandeliers.   The large Sweet Rose has been sparklized with Lavendar Stickles, and all other flowers have been blinged up with Star Dust Stickles.

Here you can see the two new sets in full:
Aren't they adorable and look at all the fun sentiments you get in each set!
 
Please make sure you head over to the Stamps and Smiles Blog to see what the other DT members have made because all the samples are so amazing!!!! 

Also, don't forget on Friday night, August 27th from 8 pm – 9 pm CST we will have our Blog Hop. Grab the banner from the Stamps and Smiles Blog sidebar and place it on the top of your Blog, because one lucky winner will win 5 FREE stamp sets from the NEW release....But don’t forget to sign your name with Mr. Linky while you are there too! 


Little Stinker Card:
Copic Colors Used: B0000, B000, B00, B01, B02, Y000, Y00, Y02, Y08, C1, C3, RV42, R00, R20, YG0000, YG01, YG03

Yummy in My Tummy Card:
Copic Colors Used: V0000, V000, V01, V12, V15, C3, RV42, R00, R20
Challenge I would like to enter:
Cute Card Thursday - Sketch

♥ Thanks for stopping by! ♥
Photobucket

Friday, August 20, 2010

TIOT #81 - Dreamweaver....PART TWO

If you've seen my post from yesterday you will know that the TIOT challenge this week over at the SCACD Blog is to use Dreamweaver Products.  Yesterday I shared with you my card and today I would like to share the cute gift bag that I made to go along with this card!
Here is the set together using the Aurora - Bee Mine from the Aurora 2 Collection by Victoria Case for SCACD.  Papers are from the Basic Grey Olivia Collection.
Aurora was stamped on the bag using Memento Tuxedo Black ink.  I've used Suzanne's wonderful Fabric Stamping tutorial.  I heat set the stamped image before coloring with Copics...remember if you are coloring on fabric to use a very light hand as the fabric soaks up the ink very fast.
The swirls were made using my Crafter's Workshop Swirly Q's stencil and Copic ABS to airbrush the swirl with colors to match Aurora.  Then I took my Viva Decor Glitter Liner in Hologram to outline the swirl to add some bling.
Flower are from Wild Orchid Crafts.  Flower arrangement consists of two 25mm white roses (that were airbrushed to match the blue in the papers), and three 15mm pink roses.  All flowers have been sparklized with Star Dust Stickles.  Then I took my Swirl punch to make some swirls to add to the flower arrangement and stay with the swirl theme.
 Finally is the tag that uses the same Basic Grey Olivia papers.  Pink part of the tag was accented with stamp from Tiny Tags and sentiment is from Teeny Tiny Wishes (both from SU).  I hope you've enjoyed my gift set! 

Remember all Dreamweaver embossing pastes and micas can also be used with the Crafter's Workshop Stencils! :)

**Shopping Alert**  Susana is just rolling in the new products over at SCACD...and let me tell you she has some fun and wonderful things coming in!  Check out the NEW Spellbinders, and NEW Tonertex Pen, Foils and Glitter (this product looks AMAZING...I can't wait to try this out!).  Happy Shopping! 

Recipe:
Stamps: Aurora - Bee Mine (Aurora 2 Collection by Victoria Case for SCACD), Teeny Tiny Wishes (SU), Tiny Tags (SU),
Inks: Memento Tuxedo Black, Copics, White Gel Pen, Hero Arts Shadow Ink,
Copic Colors Used: T4, T8, T10, W3, E000, E00, E11, E21, E25, E29, E31, E51, E53, Y02, Y18, Y19, YR16, YR68, V09, R30, R32, BG11, BG45, BG72.
Papers: Basic Grey Olivia Collection
Tools: Bow Easy, Dreamweaver Flower Lace stencil, Crafter's Workshop Swirly Q's stencil,Nellie Snellen corner die, MS border punch, modern label and word window punch (SU), Copic ABS, EK success tag punch, EK Success swirl punch,
EmbellishmentsViva Decor Glitter Liner in Hologram,Flower from Wild Orchid Crafts: pink Classic Sweet Rose, 25mm white rose, 15mm pink roses, and 6mm closed rosebuds, Star Dust Stickles, ribbon from my friend Jen ;)

♥ Thanks for stopping by! ♥

Photobucket

LinkWithin

Related Posts Plugin for WordPress, Blogger...